
I'm a massive fan of Digi-Stamps, I love the way you can alter them to suit your needs. I didn't realise that there are some crafters out there that don't know how to use them, or how to copy and paste. One of those is my mum, so I sat down with her the other night to show her how I use them, resize them and print them. So I decided to put together a tutorial to show you how, now my intentions are not to teach you to such eggs but to help those of you who would like to know the basics........................so here goes......................
 Open up your documents, pictures or hard-drive where your Digi-Stamps are stored. Double click on the folder you want to access
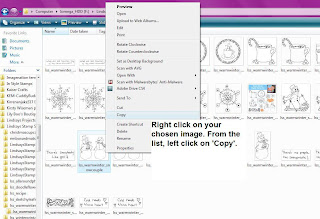 Find the image you want. Now sometimes you get two of the same images one is a JPG file and the other is a PNG file. When copying and pasting this way I use the JPG file. Right click your image and click on the 'Copy' command
 Going to your start bar on bottom left hand-side of your computer and open up Microsoft Word from your programs list
 Staying in Word, right click on any white space and then click on the 'Paste' option. This will place your image onto the white page
 This has now placed your image in a random place and suize but you may not what your image in this place or this size. So you will now need to alter this, especially if you want to fit several images on one sheet of A4 paper or card
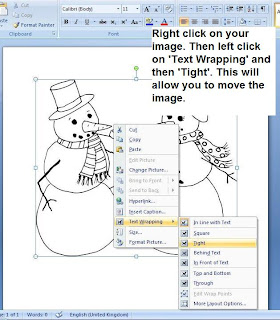 Now Right click on the image and hover over 'Text Wrapping' and a second list appears. Click on 'Tight'. This will allow you to move the image around the page and fit several images on one page
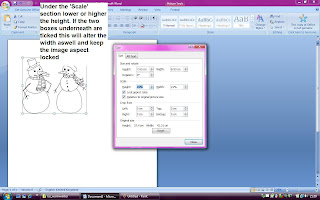 Under the 'Scale' section' click on the higher or lower arrow button to adjust the size of your image. As long as you have the two boxes underneath ticked it will alter the width size for you to match your height size. This will allow you to keep the true aspect of your image
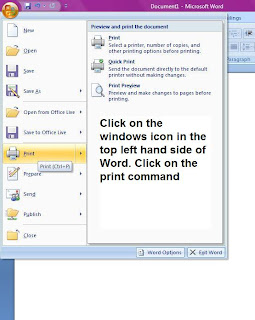 Now you all you need to do is print your image. Now you don't want to do this step yet if you want to put several images on one page. If you want to do this then just repeat the steps that you have just followed before printing. Now you are ready to print, click on the Windows icon at the top left hand-side, then click on the 'Print' option
The Print command box will now appear. Just click on 'Ok' to print out your images and you are finished..............ta da
I hope you have found this tutorial useful. Remember you can save the images on my blog if you want to or you can click them to view them in a magnified view. Take care Nettie.x


Wow...What a useful thing to have done for everyone! This is fabulous!
ReplyDeleteGreat tutorial for the beginning digi-stamper!
ReplyDeleteI hope that this helps others as not everyone has someone to show them how to do things.
ReplyDeleteI enjoyed being able to do something for myself without waiting for someone to come home from work so well done young lady.You are an extra special young lady who only sees the good in others.
We are so proud of you.
love mum & Dad
That is wonderful, I'm gonna add an extra link to this!
ReplyDelete